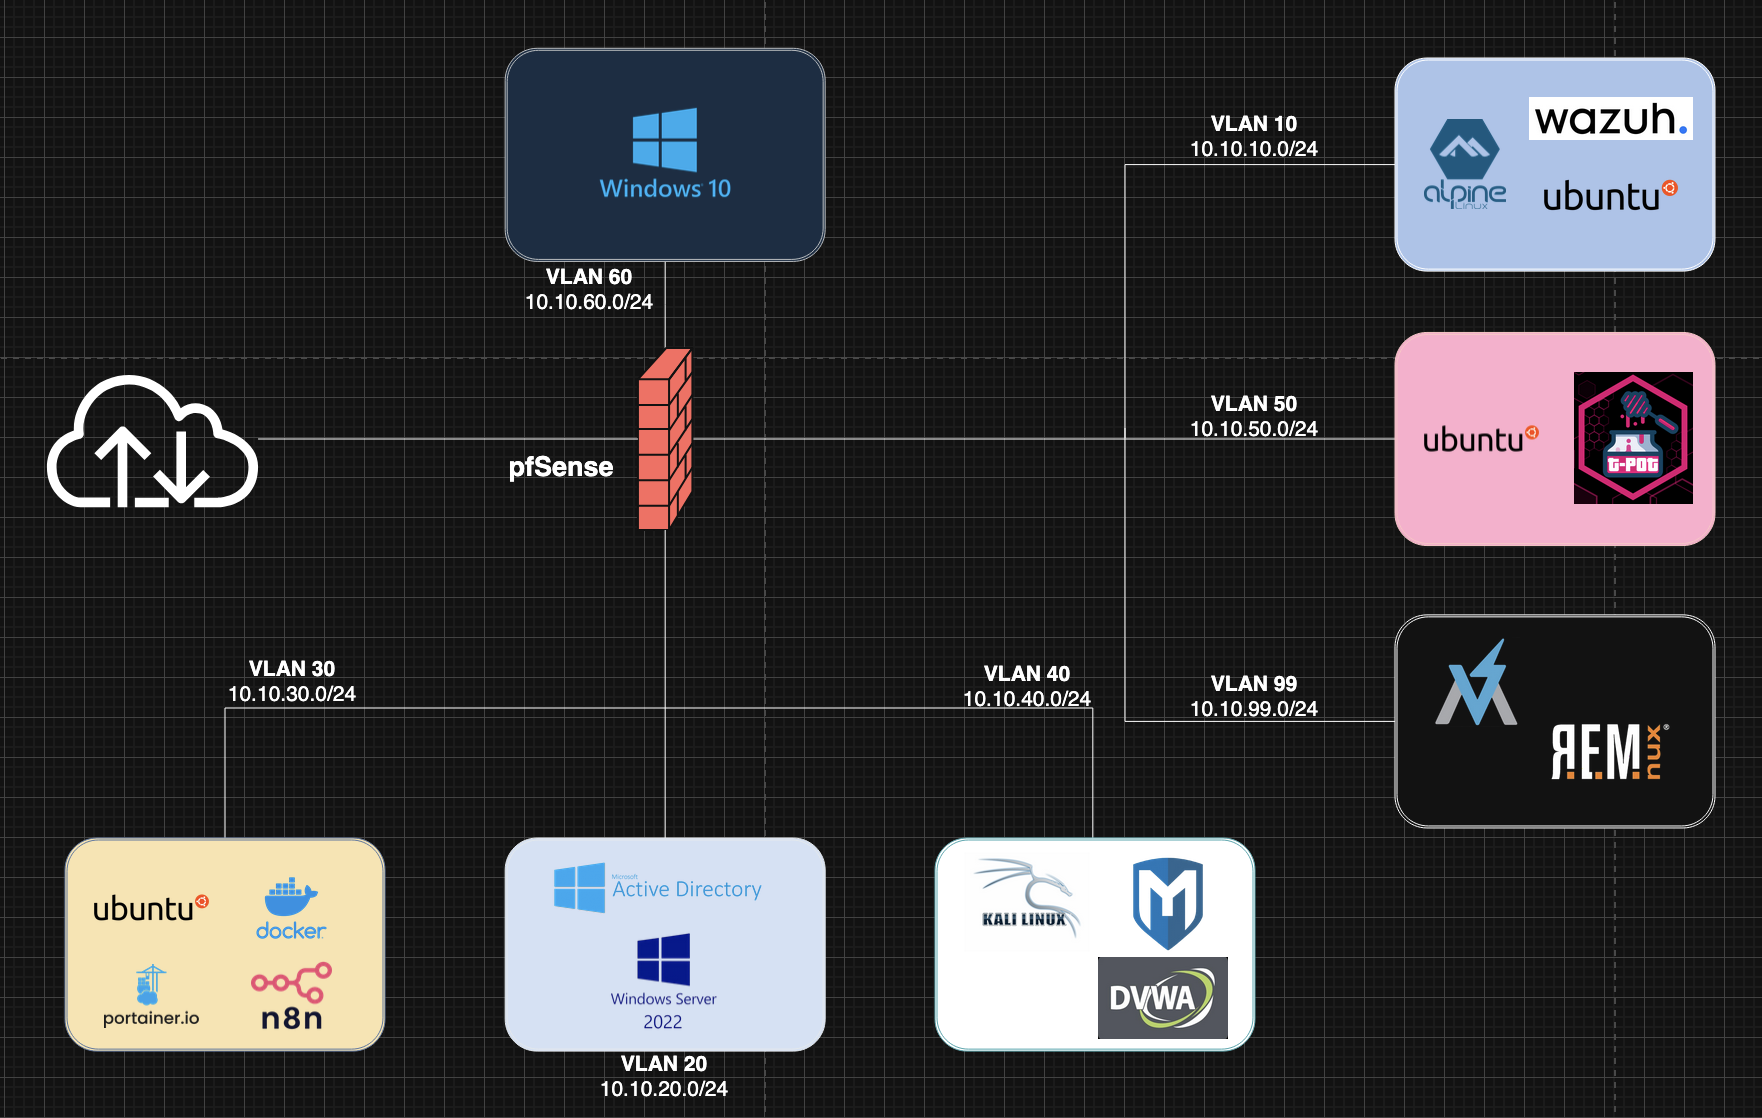
This is the first layer of the lab. I start with one Proxmox node, one internal VLAN-aware bridge, and pfSense as the router and firewall between the outside network and the future lab networks.
I keep the goal small on purpose. I do not install services yet. Before I add Windows, Docker, Wazuh, Kali, honeypots, or malware-analysis machines, I want the network base to be correct.
What I Built
Physical host:  homelab
Hypervisor:     Proxmox VE
Firewall VM:    prod-firewall
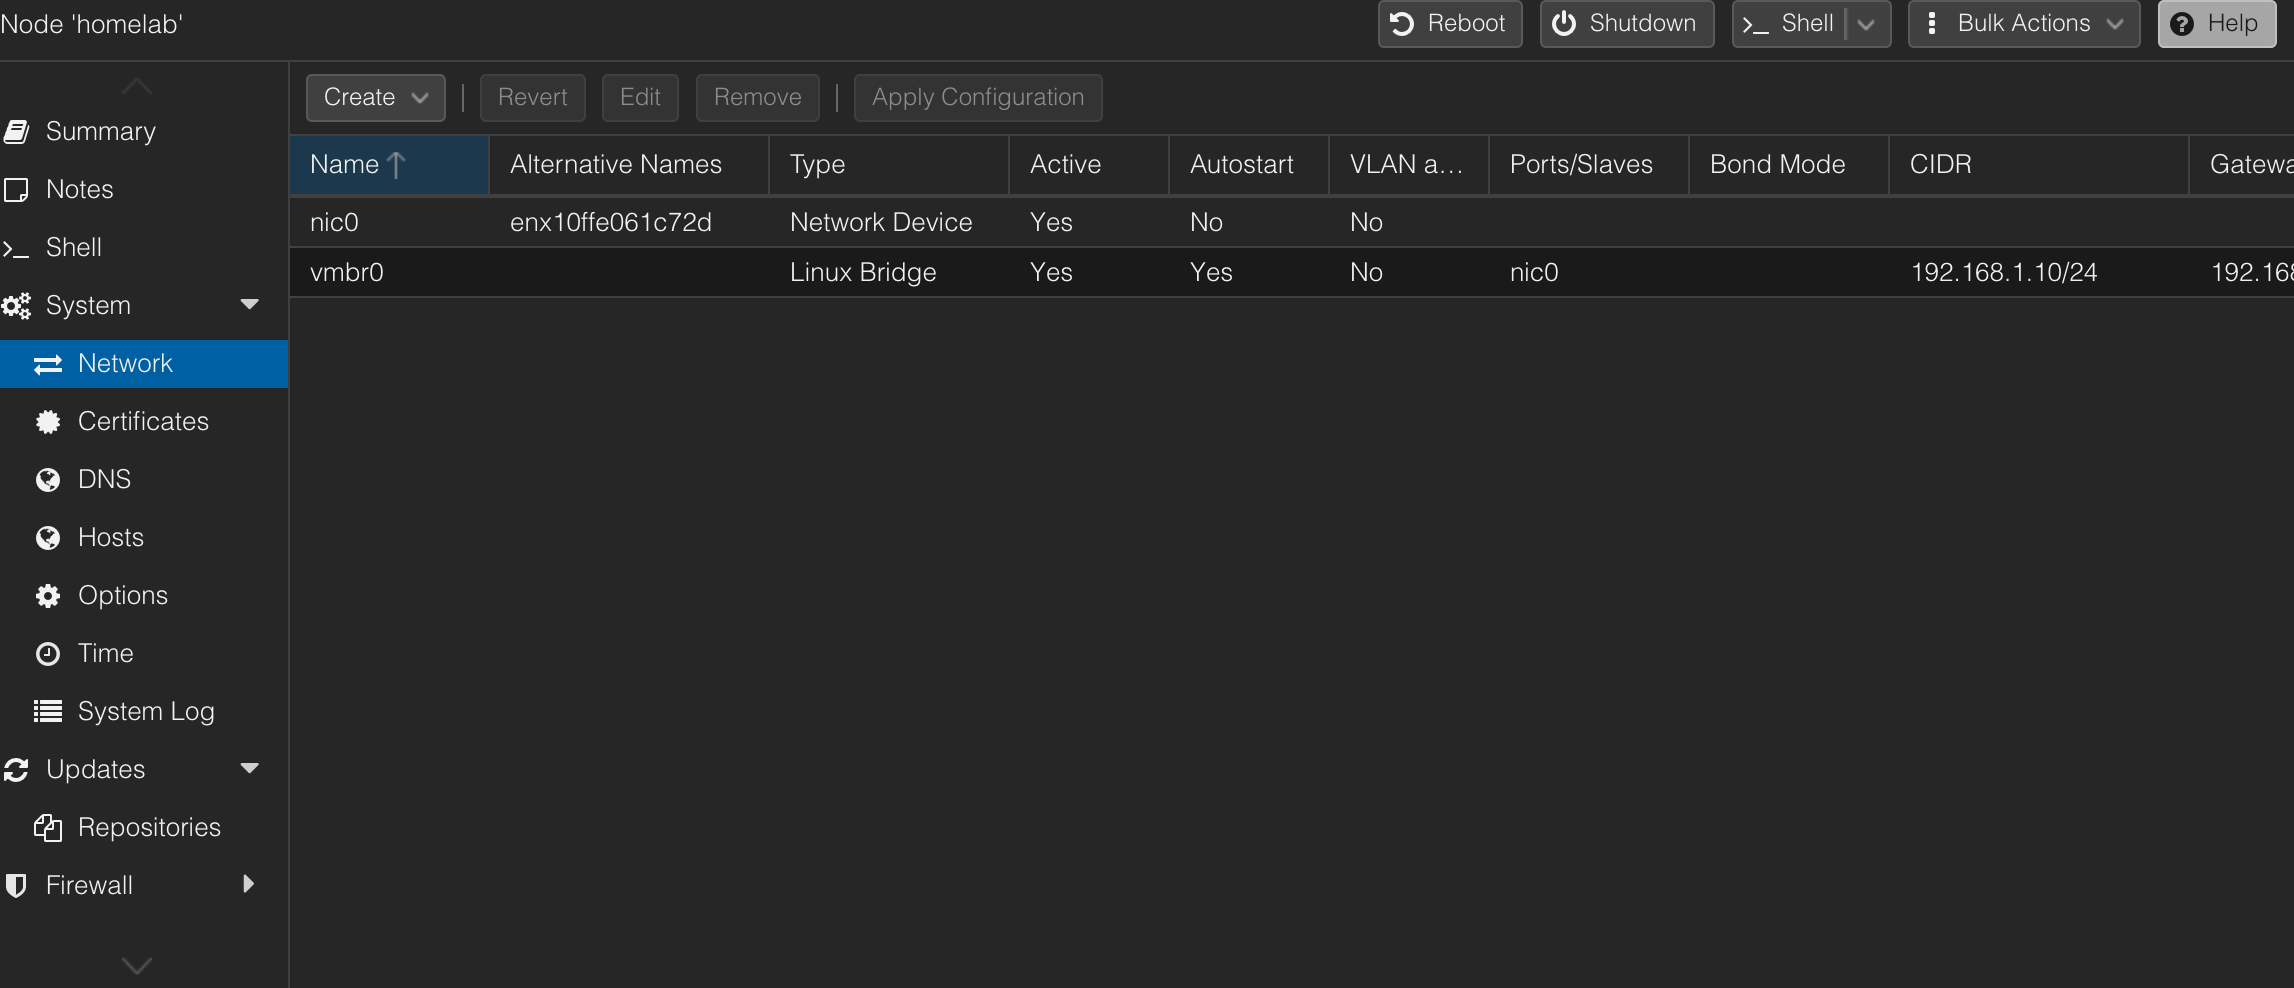
WAN bridge:     vmbr0 -> home LAN / upstream router
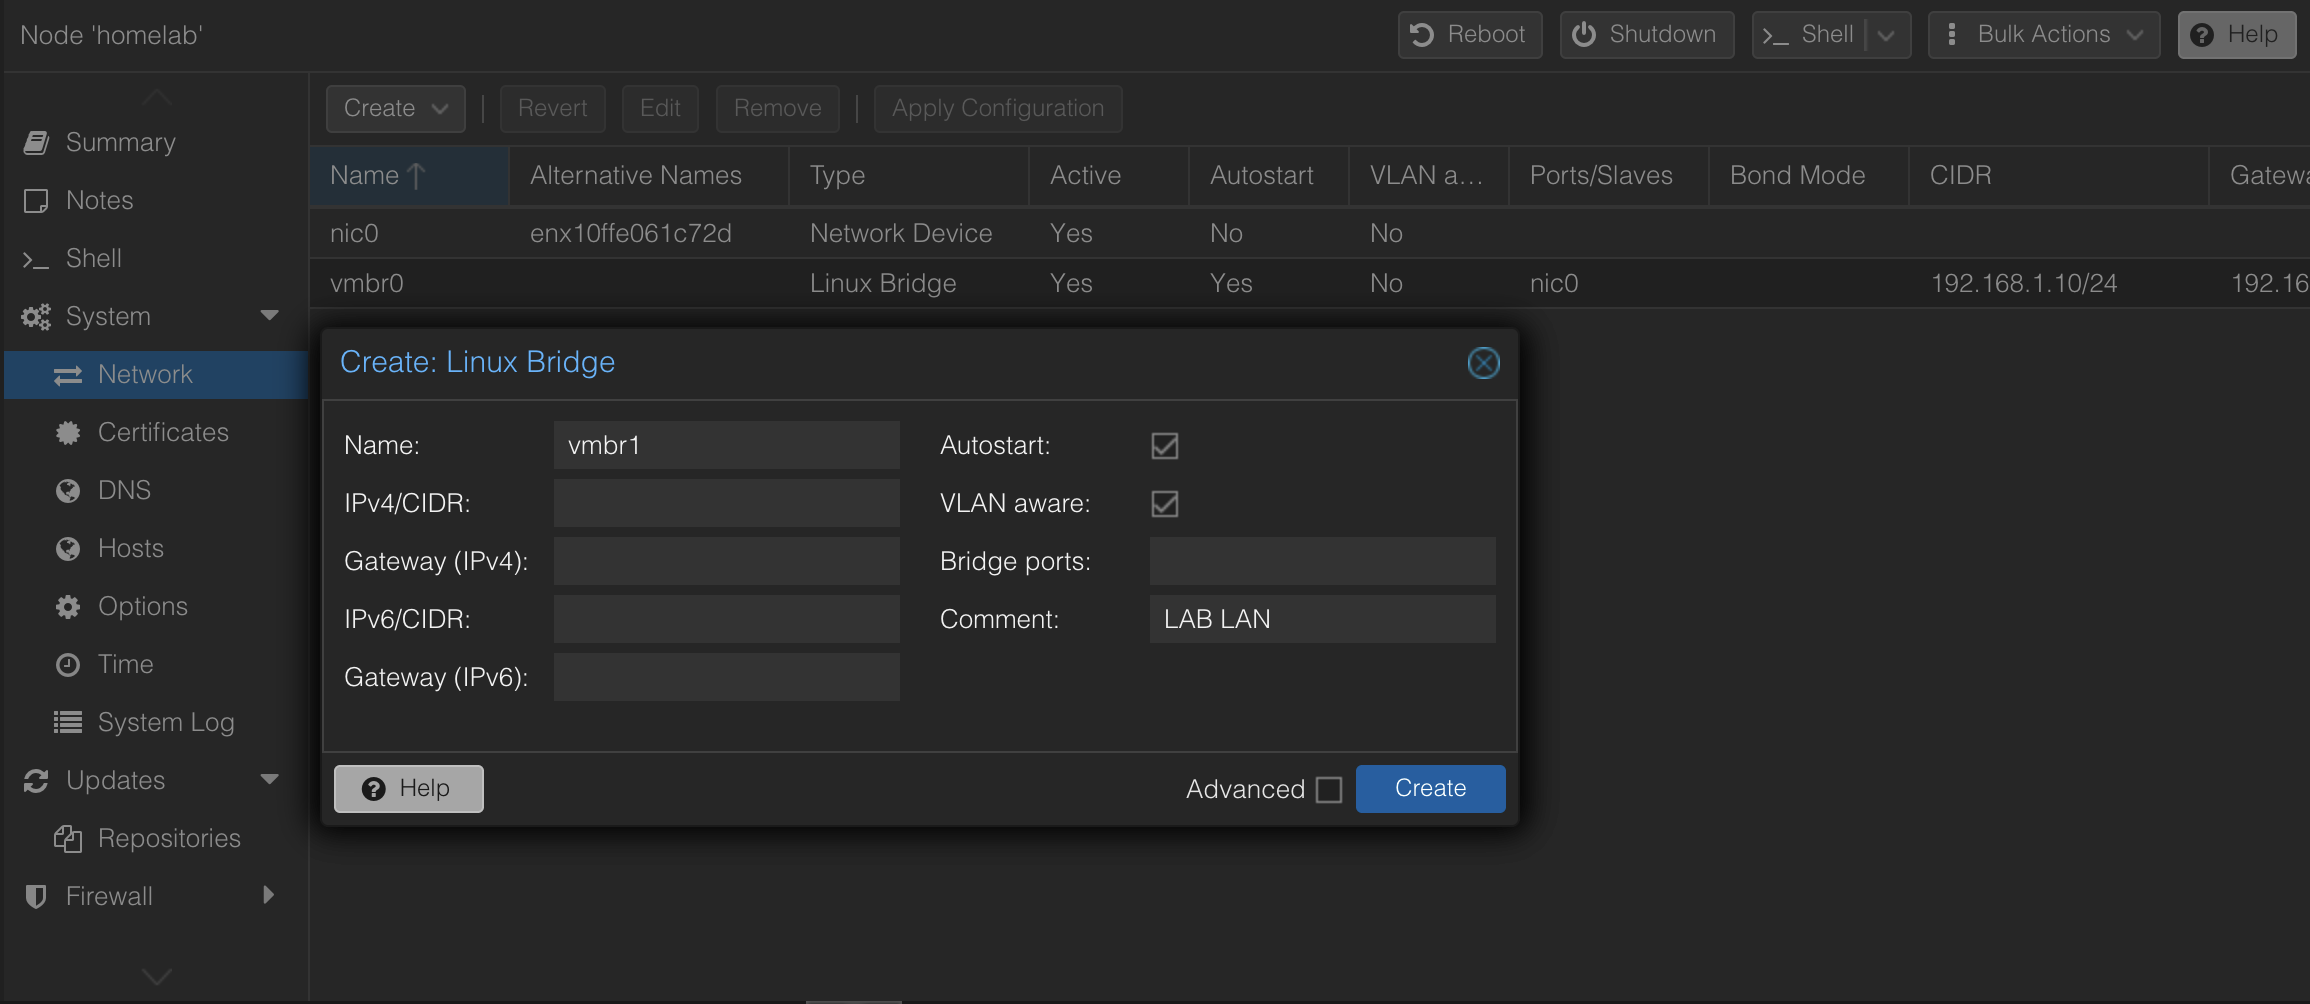
LAN bridge:     vmbr1 -> internal lab bridge, VLAN-aware, no physical uplink
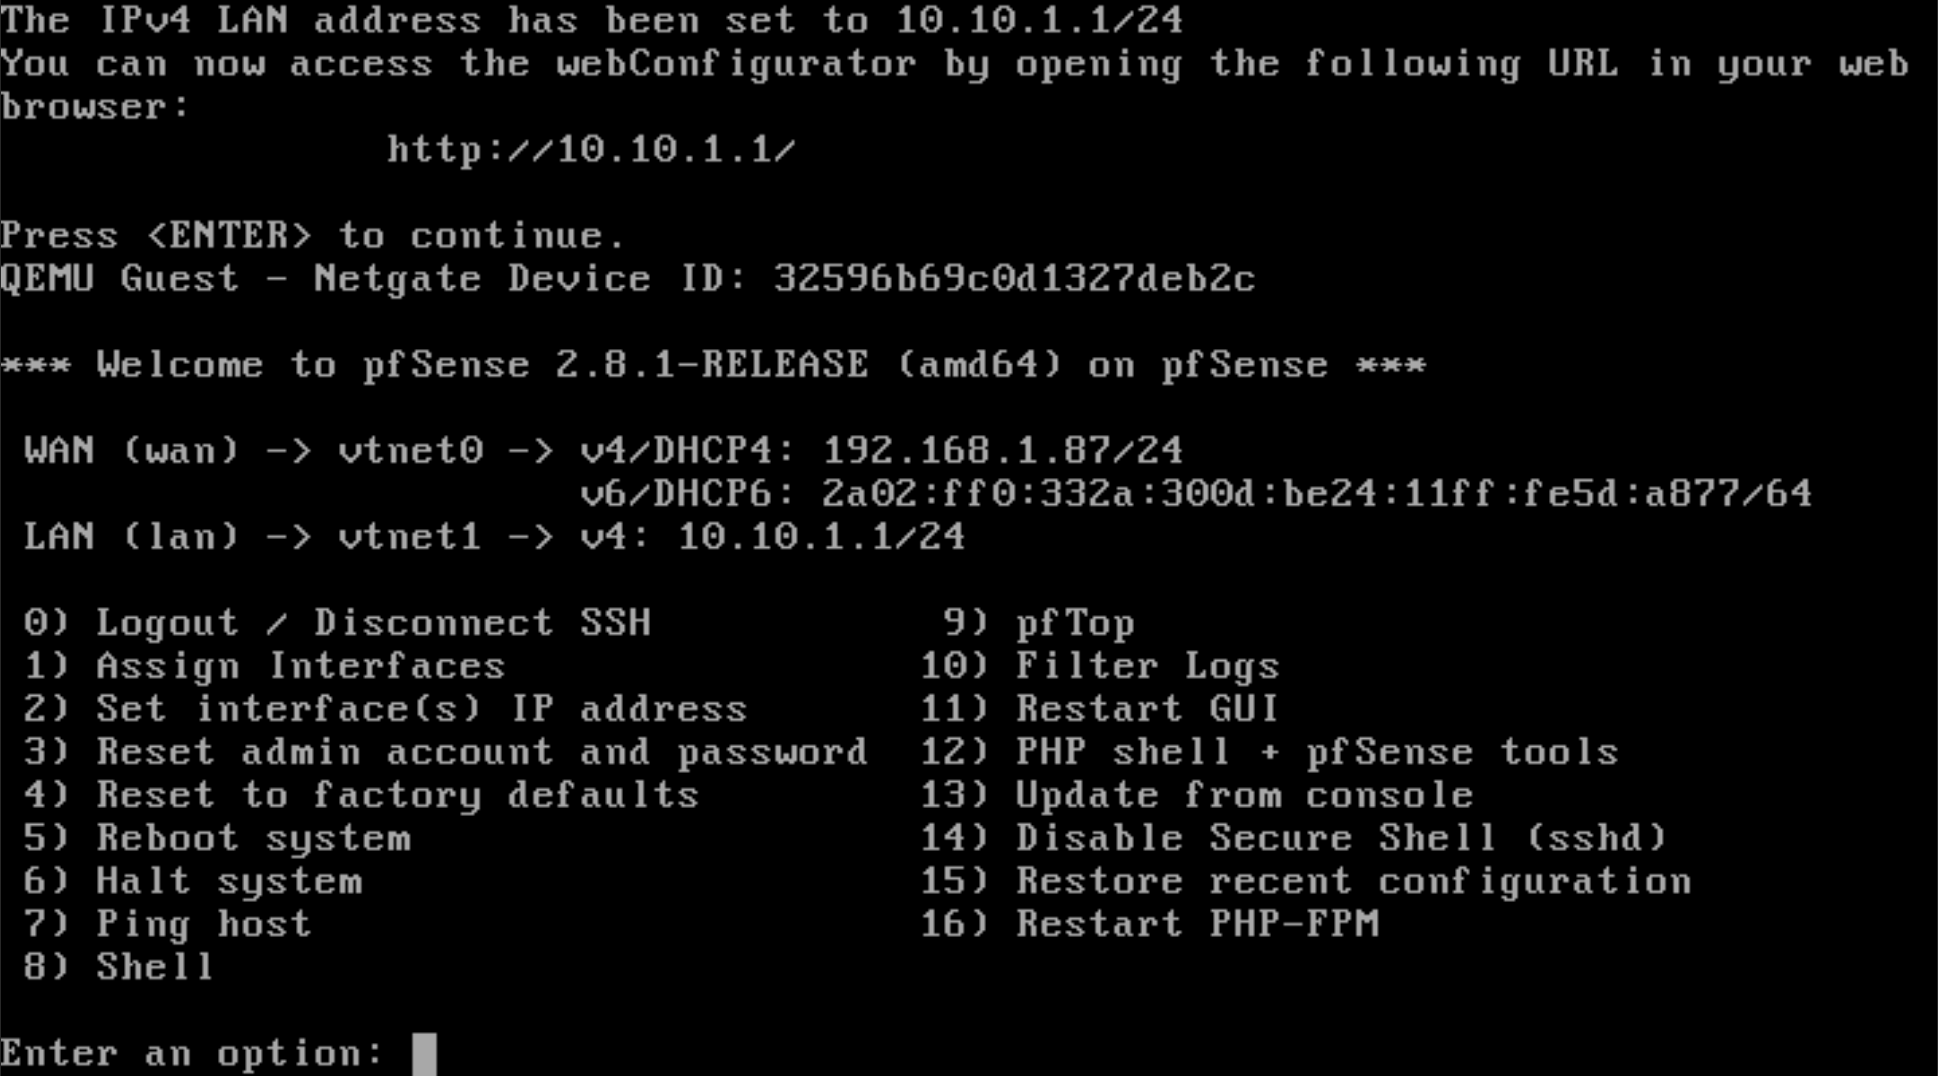
pfSense WAN:    vtnet0 -> 192.168.1.87/24
pfSense LAN:    vtnet1 -> 10.10.1.1/24
Why This Matters
The firewall VM is the control point of the lab. Every later part depends on these basic rules:
- lab VMs should not talk directly to the home router;
- internal traffic should pass through pfSense;
- Proxmox should not have an IP address on the internal lab bridge;
- future VLANs should sit cleanly on top of
vmbr1.
This is what makes the project more than a group of VMs. It becomes a segmented lab where I can later test identity, telemetry, detection, attacks, honeypots, malware isolation, and automation in a controlled way.
Topology Slice
Internet / home router
        |
      vmbr0
        |
  pfSense WAN
  pfSense LAN
        |
      vmbr1  (VLAN-aware, no bridge port, no Proxmox IP)
        |
 future lab VLANs
The key design choice is vmbr1. It is an internal software bridge. It has no physical port and no IP address on the Proxmox host. This keeps Proxmox management outside the lab segments.
Build Steps
Proxmox Post-Install Fixes
The first cleanup was Proxmox package repositories. Without a paid subscription, the enterprise repository can break updates, so I disabled it and used the no-subscription repository.
For Proxmox 9 (trixie):
sed -i 's/^/#/' /etc/apt/sources.list.d/pve-enterprise.sources
sed -i 's/^/#/' /etc/apt/sources.list.d/ceph.sources

echo "deb http://download.proxmox.com/debian/pve trixie pve-no-subscription" \
  >> /etc/apt/sources.list

apt update && apt dist-upgrade -y
For Proxmox 8 (bookworm):
sed -i 's/^deb/#deb/' /etc/apt/sources.list.d/pve-enterprise.list
sed -i 's/^deb/#deb/' /etc/apt/sources.list.d/ceph.list

echo "deb http://download.proxmox.com/debian/pve bookworm pve-no-subscription" \
  >> /etc/apt/sources.list

apt update && apt dist-upgrade -y
Optional subscription popup patch:
sed -i.bak "s/NotFound/Active/g" /usr/share/perl5/PVE/API2/Subscription.pm
systemctl restart pveproxy
Create the Internal Bridge
In the Proxmox web UI, I created the bridge like this:
System -> Network -> Create -> Linux Bridge
Name:          vmbr1
IPv4/CIDR:     empty
Bridge ports:  empty
VLAN aware:    enabled
Comment:       LAB LAN
Create the pfSense VM
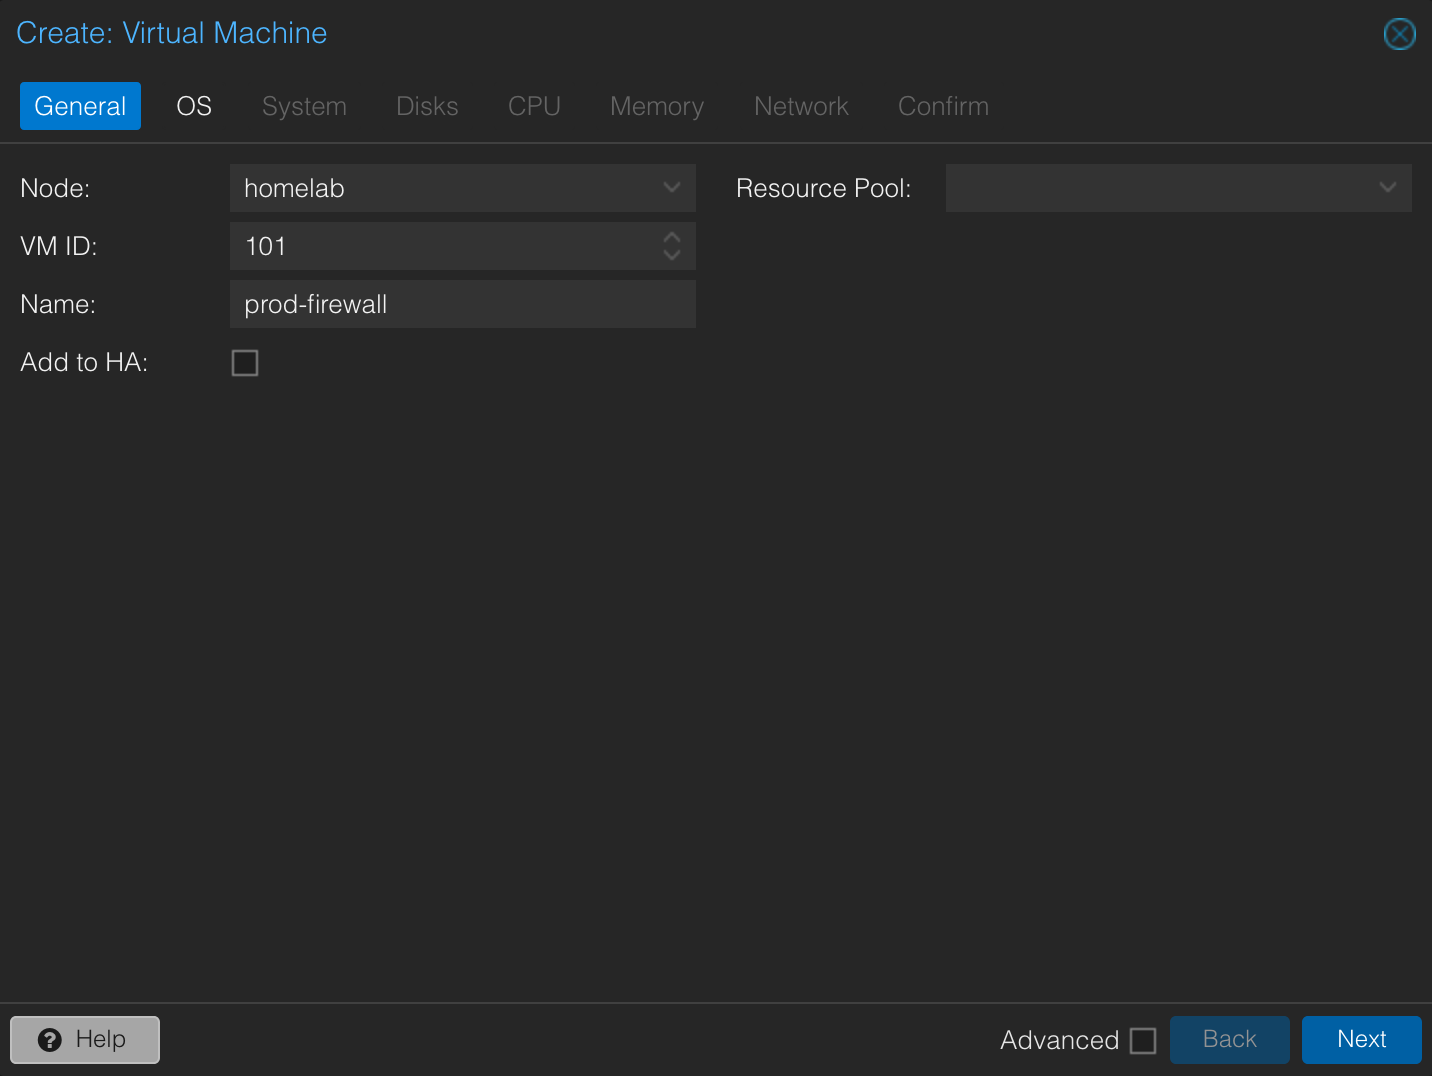
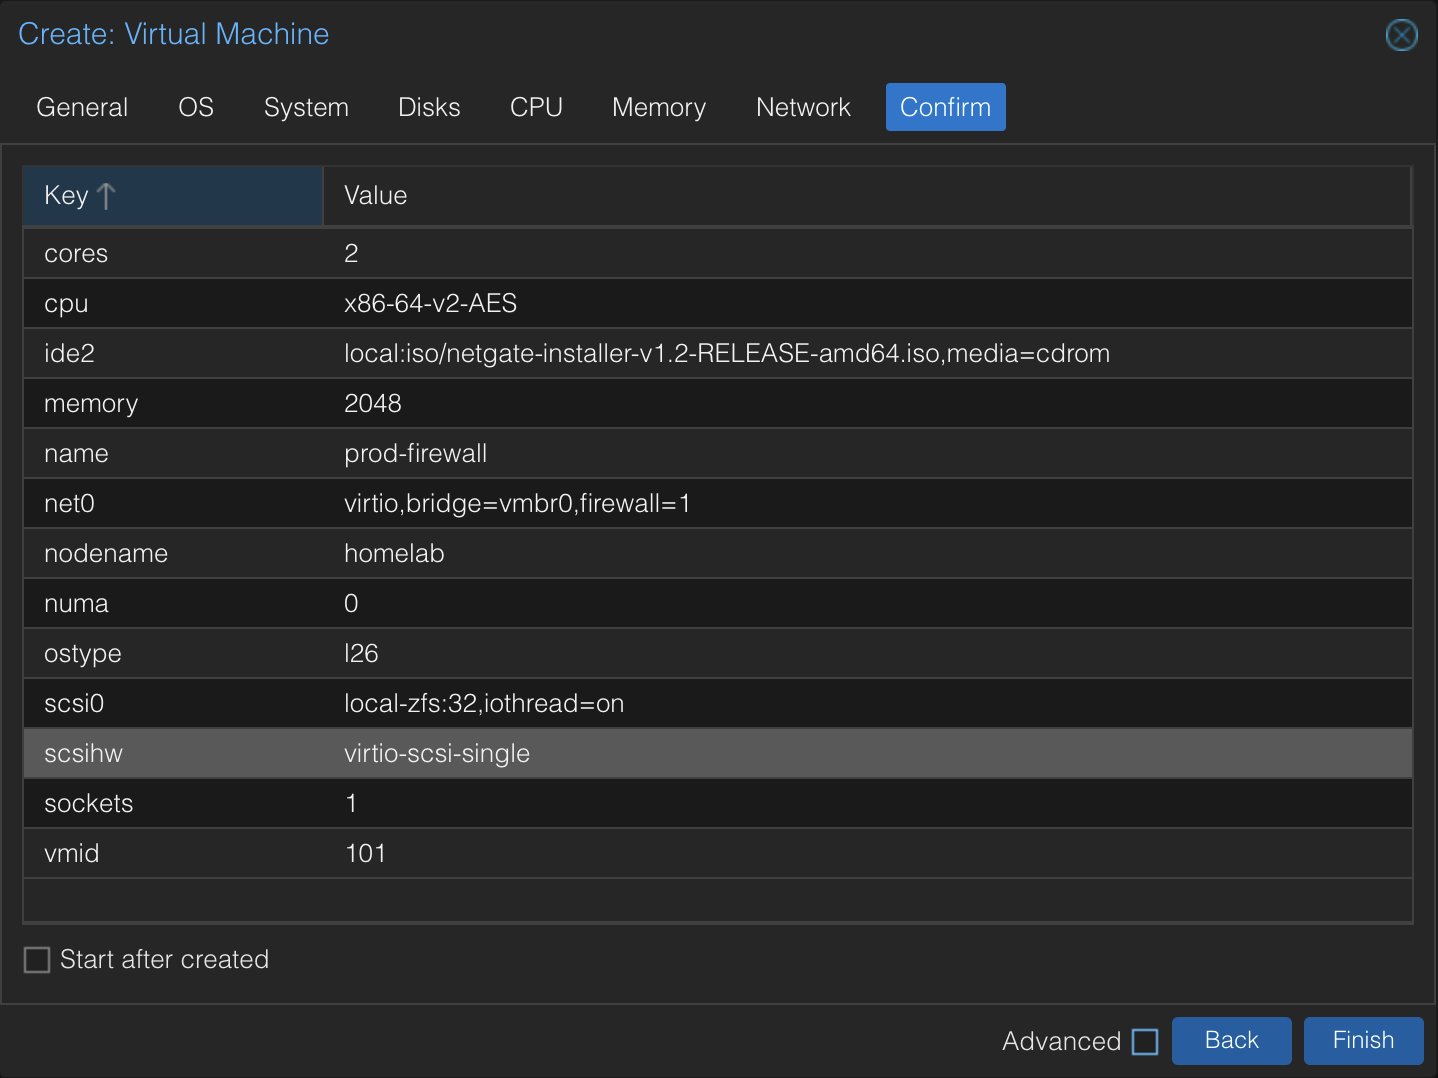
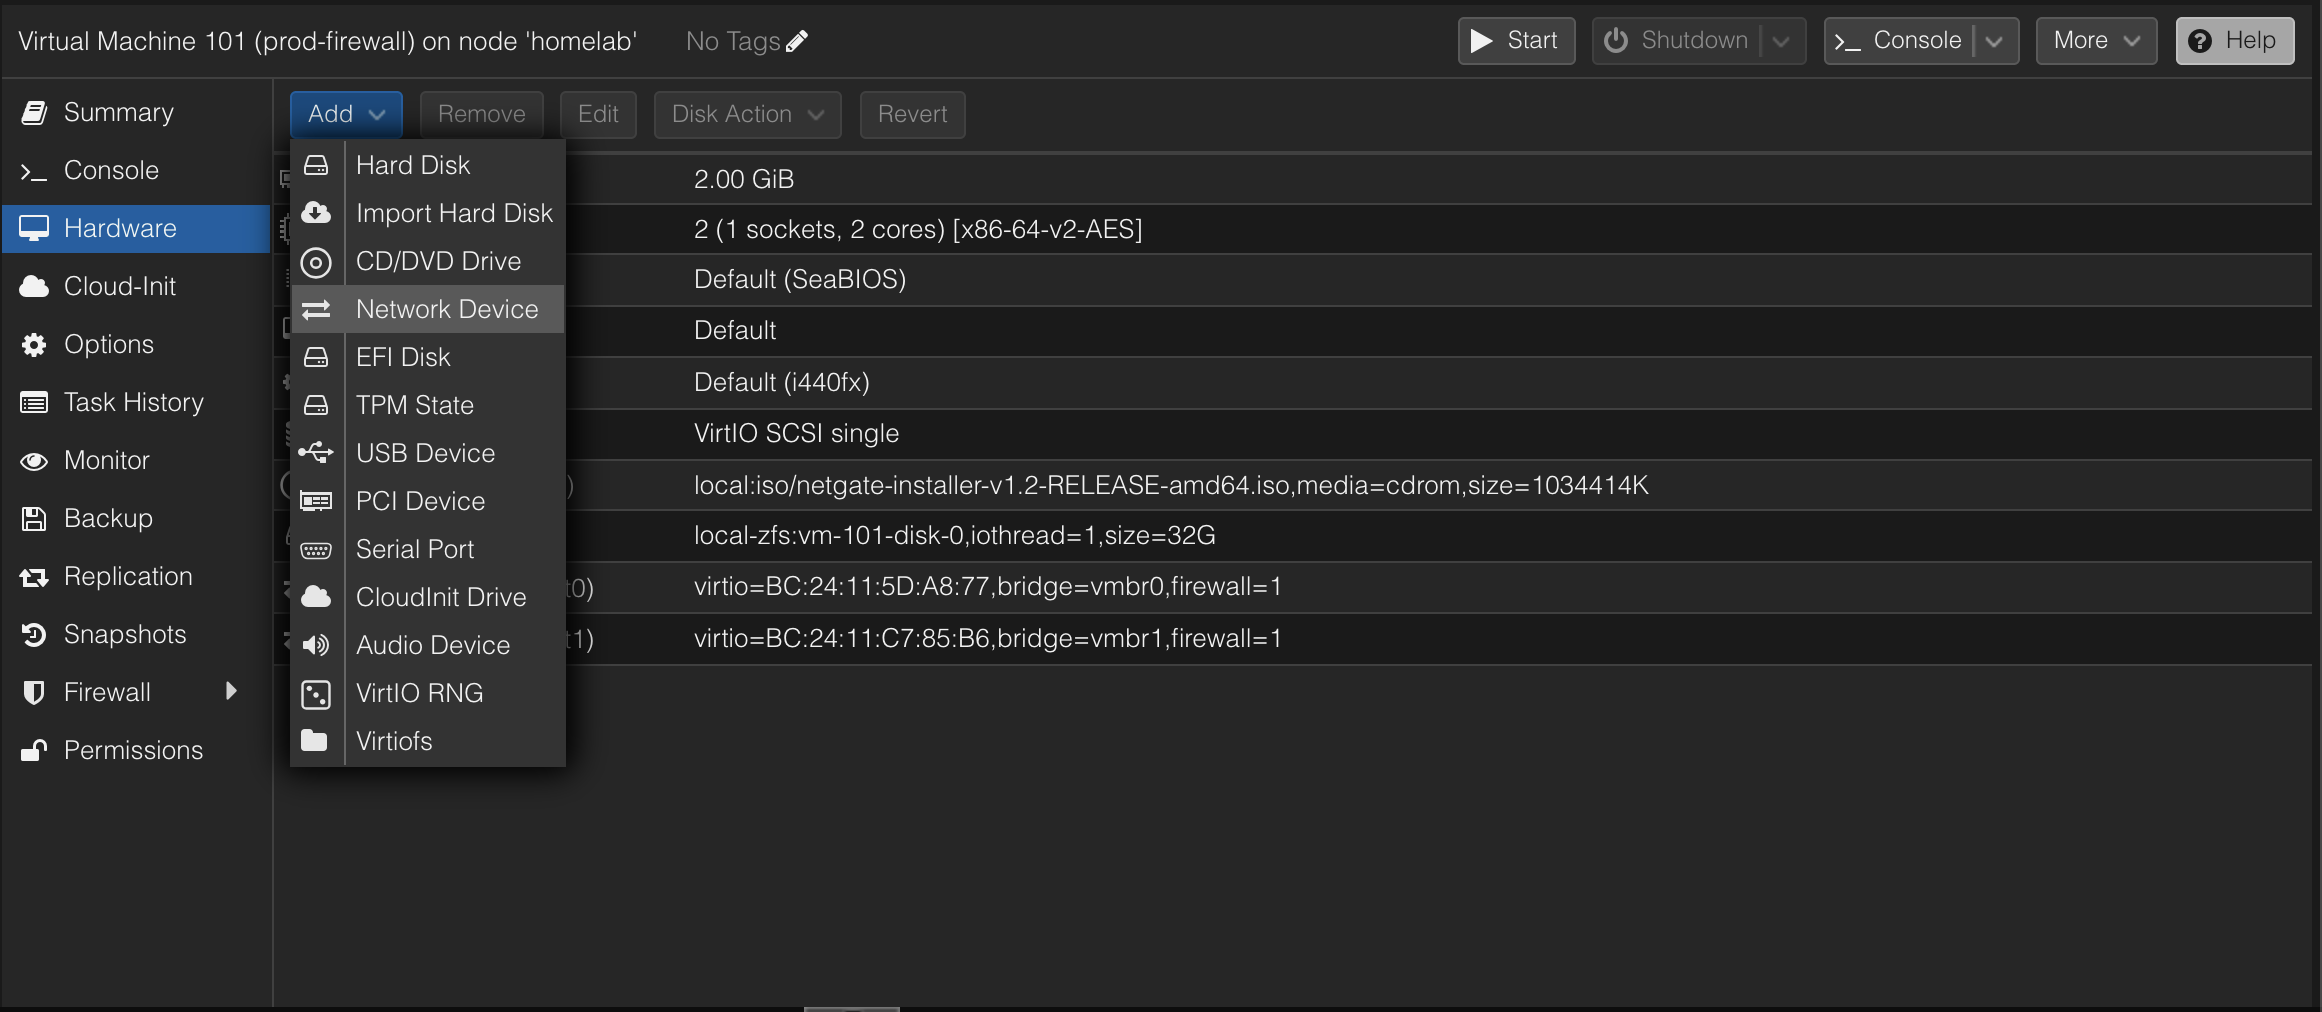
Next, I created prod-firewall as VM 101.
CPU:       2 cores
RAM:       2 GB
Disk:      32 GB, local-zfs
NIC 1:     vmbr0, VirtIO -> WAN
NIC 2:     vmbr1, VirtIO -> LAN
Install pfSense
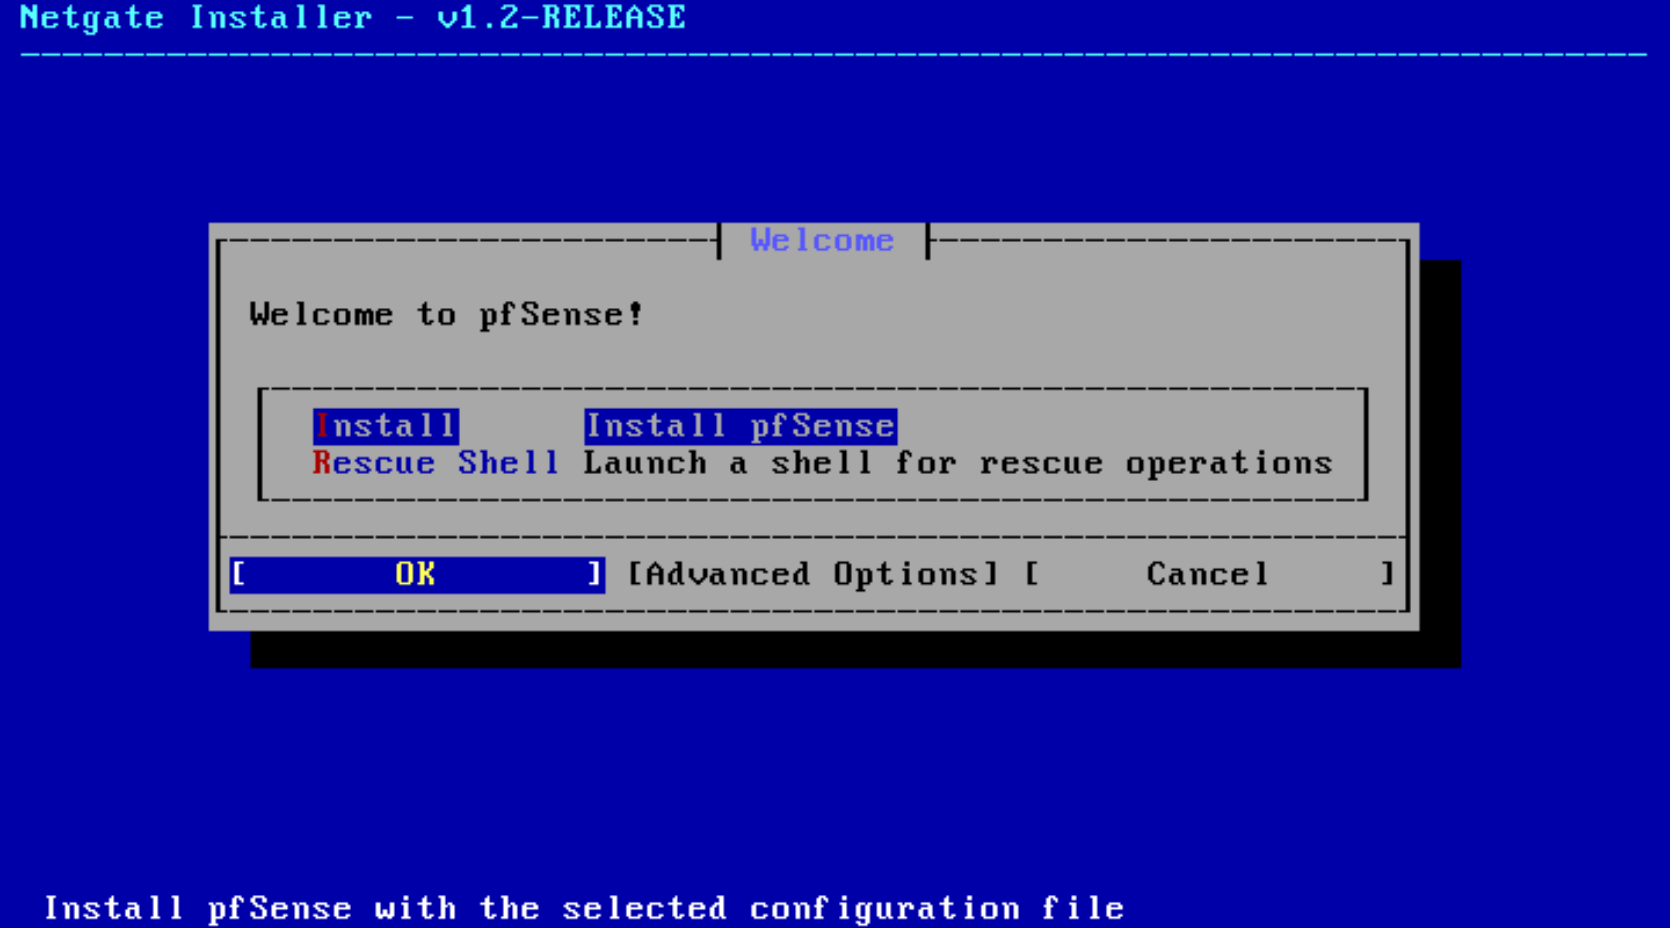
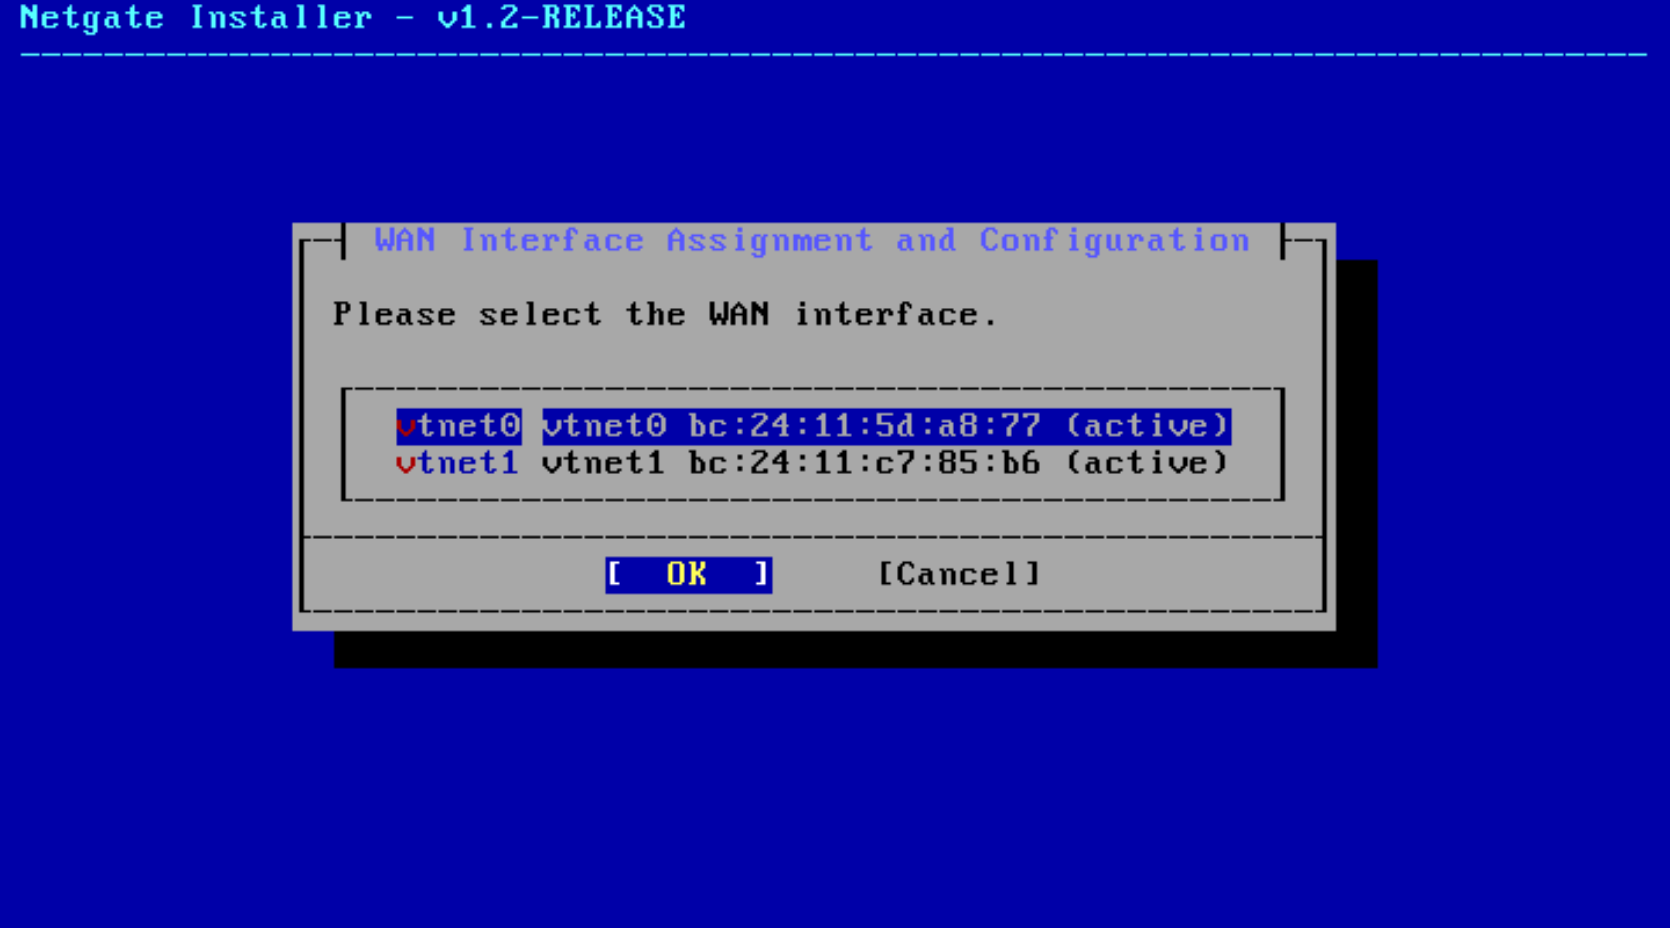
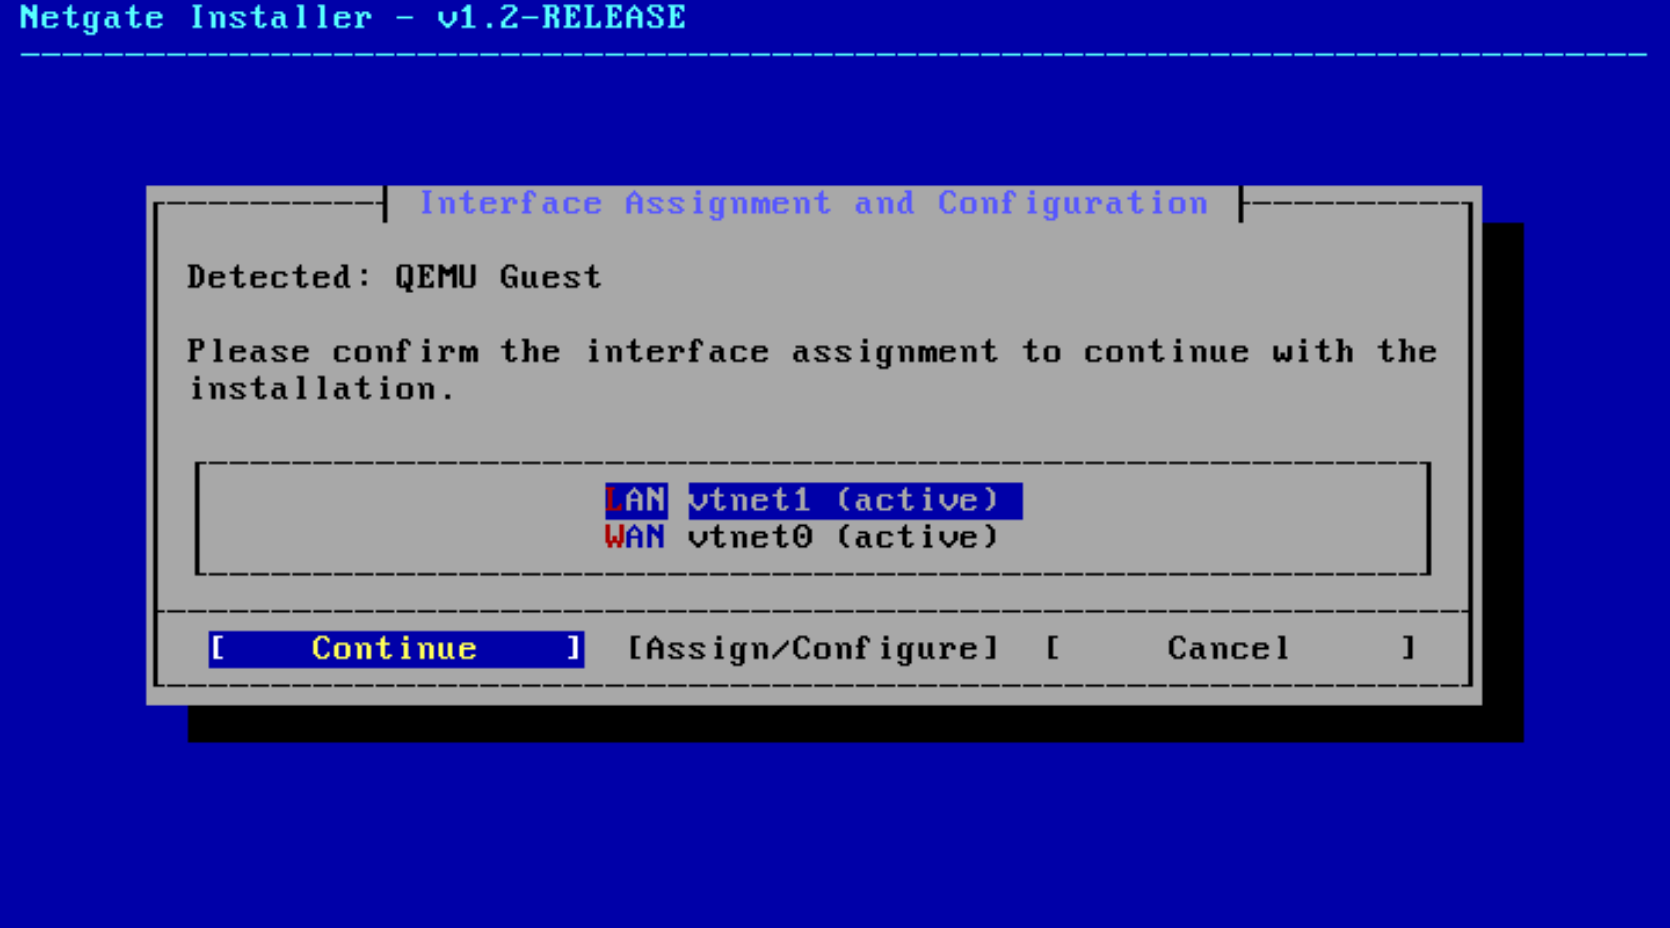
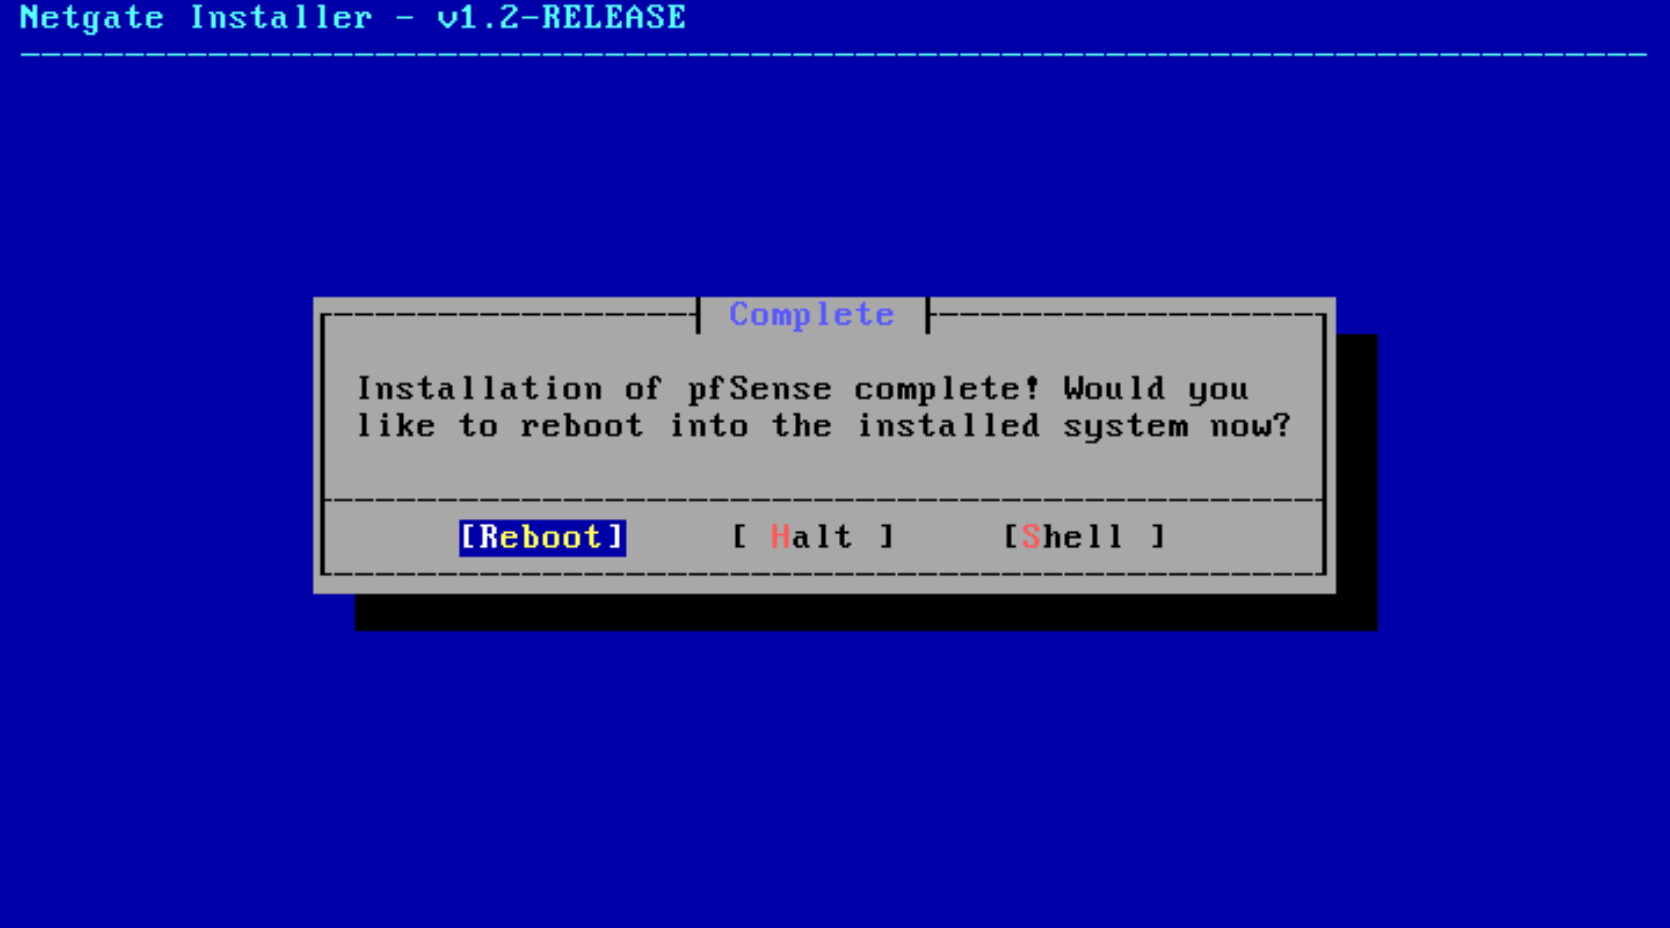
Most pfSense installer prompts stayed at their defaults:
Install mode:      Install
Filesystem:        ZFS
Pool type:         Stripe
Partition scheme:  GPT
WAN:               vtnet0
LAN:               vtnet1
After the first boot, I used the pfSense console to set the LAN side:
LAN IPv4 address: 10.10.1.1
Subnet:           24
Gateway on LAN:   empty
DHCP on LAN:      enabled later
Problems I Hit
Proxmox update failed. The enterprise repository was enabled, but I did not have a paid subscription. I disabled the enterprise and Ceph repositories, then added pve-no-subscription.
The internal bridge must not have an IP. If vmbr1 has an address, the Proxmox host becomes reachable from inside the lab. That weakens the boundary I want.
pfSense interface order matters. The first NIC became vtnet0, and the second became vtnet1. I checked the mapping from the pfSense console before moving on.
What I Learned
The important part of a virtual firewall is not just “two NICs.” The important part is deciding which path each NIC owns. vmbr0 is the outside path, vmbr1 is the inside path, and pfSense is the only router I want between them.
I also learned that Proxmox bridges can blur security boundaries if I assign IP addresses without thinking. Keeping vmbr1 unnumbered makes the topology easier to understand and safer to expand.
Validation Evidence
I consider this base healthy when these checks are true:
Proxmox updates work from the no-subscription repo.
vmbr1 exists, is VLAN-aware, and has no IP.
pfSense boots with WAN=vtnet0 and LAN=vtnet1.
pfSense LAN is 10.10.1.1/24.
Useful checks:
pveversion
ip addr show vmbr1
qm config 101
On pfSense console:
Option 1 - Assign Interfaces
Option 2 - Set interface(s) IP address
What This Enables Next
Next, I add a small Alpine jumpbox on the LAN side. It will become the controlled entry point into pfSense and the rest of the lab.
Quick Reference
vmbr0 -> upstream/home network
vmbr1 -> internal lab bridge, VLAN-aware, no physical uplink, no Proxmox IP
pfSense vtnet0 -> WAN
pfSense vtnet1 -> LAN
pfSense LAN IP -> 10.10.1.1/24
sed -i 's/^/#/' /etc/apt/sources.list.d/pve-enterprise.sources
sed -i 's/^/#/' /etc/apt/sources.list.d/ceph.sources
echo "deb http://download.proxmox.com/debian/pve trixie pve-no-subscription" >> /etc/apt/sources.list
apt update && apt dist-upgrade -y